- Create new event
- Accept or decline an event
- Cancel/delete event
- Participant limit/waiting list
- Make events bookable only from a certain time (time window for acceptances and cancellations)
- Children & guest registration
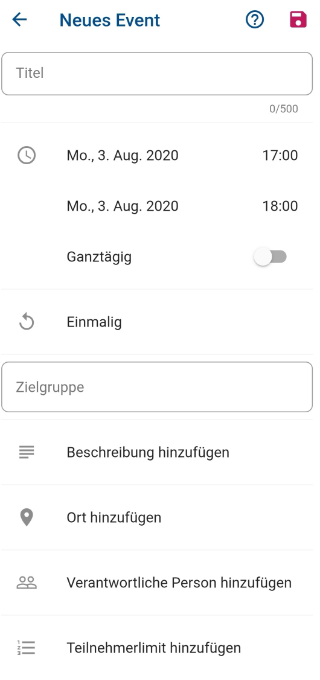
Create new event 🎉
You can create a new event either via the button at the bottom right (blue in the app, pink on the web) on your timeline or via the button at the bottom right in your calendar.
Every club member can create events for one-time or recurring training sessions and events. In addition to the title of the event, the date and time, you must specify which target group (Area) the appointment is aimed at.
Via the Target group field, you can select one or more Areas or individual members, similar to starting a new conversation. To reach all members regardless of their membership in the Areas, you can select “All”. However, be sparing with this option, as all members of the club will really receive a notification here. Typical cases for events to “All” are the annual general meeting, the summer party or when the entire club participates in a volunteer campaign.
Then you have the option to add a description, the location and a responsible person. You can also give your event a participant limit.
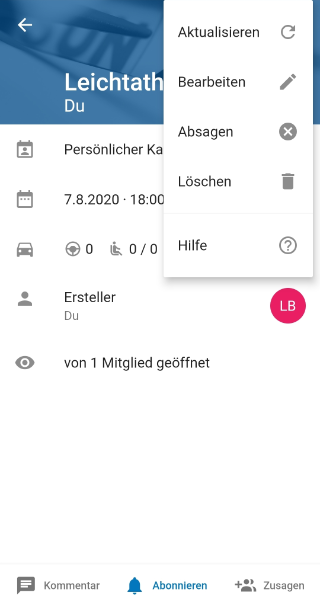
Cancel / delete event
To delete an event you created, you need to open the detail view of this event. Then click on the three small dots at the top right of your interface, whereupon you will get the options update, edit, cancel or delete.
When you then click on cancel or delete, a security prompt appears asking if you really want to delete the event. If you cancel an event, all participants will be informed (via push and in the timeline) and the event will continue to be listed as canceled in the calendar.
If you delete an event, the event will no longer be displayed and there will be no notification about it in the timeline or via push. Deleting is therefore more intended for events that were created by mistake or are still very far in the future.
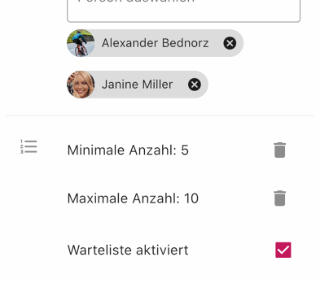
Participant limit / waiting list 📑
You can also set lower and upper participant limits for your events. In the example here, at least 5 participants must have confirmed for the bike trip event. At the same time, no more than 10 members may participate.
If you activate the waiting list, members can still register even if the maximum number of participants has been reached. Registrations 11, 12, 13 … will from then on be placed on a waiting list. If one of the first 10 participants cancels, the first person on the waiting list automatically moves up and receives a push notification about it.
Make events bookable only from a certain time
Do you want to make your events available only from a certain time, as otherwise there will be permanent bookings? For this, you have the option to create a time window for acceptances and cancellations.
Create a new event as usual. After you have filled in all relevant data, such as the date and description, scroll down further and then click on Advanced settings (Beta).
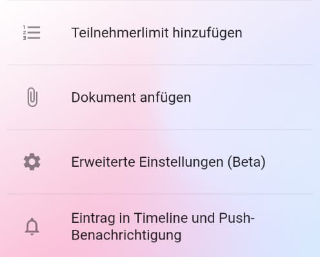
After clicking on Advanced settings, the following opens:
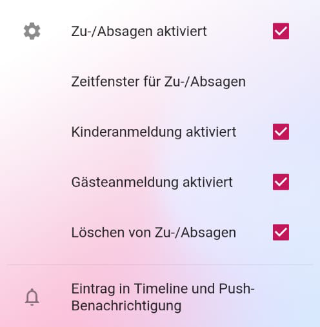
Then click on Time window for acceptances/cancellations.

Here you can now select from when members can accept or decline and also by when they must have done so.